INTERACTIVE BATTLE
Battle of Yamazaki
2 July 1582 · Yamazaki and Mount Tenno, Yamashiro Province
Eleven days after the Honnoji Incident, Hashiba Hideyoshi returned from Bitchu and defeated Akechi Mitsuhide at Yamazaki. Mitsuhide’s regime collapsed after little more than ten days, and Hideyoshi rose above his peers in the Oda house.
Background
When Oda Nobunaga was killed in the Honnō-ji Incident, Hideyoshi was conducting a water siege of Takamatsu Castle in Bitchū. After making peace with the Mōri and obtaining the castle's surrender through Shimizu Muneharu's seppuku, he rushed back across the Sanyōdō toward the Kinai region. Although Mitsuhide controlled Ōmi, he found it difficult to gather allies.
Outcome
The Akechi forces collapsed. Mitsuhide retreated to Shōryūji Castle and escaped during the night. He is said to have been killed while making his way toward Sakamoto Castle. Sakamoto Castle was also surrounded, and Akechi Hidemitsu and others set fire to the keep and took their own lives, ending the Akechi clan.
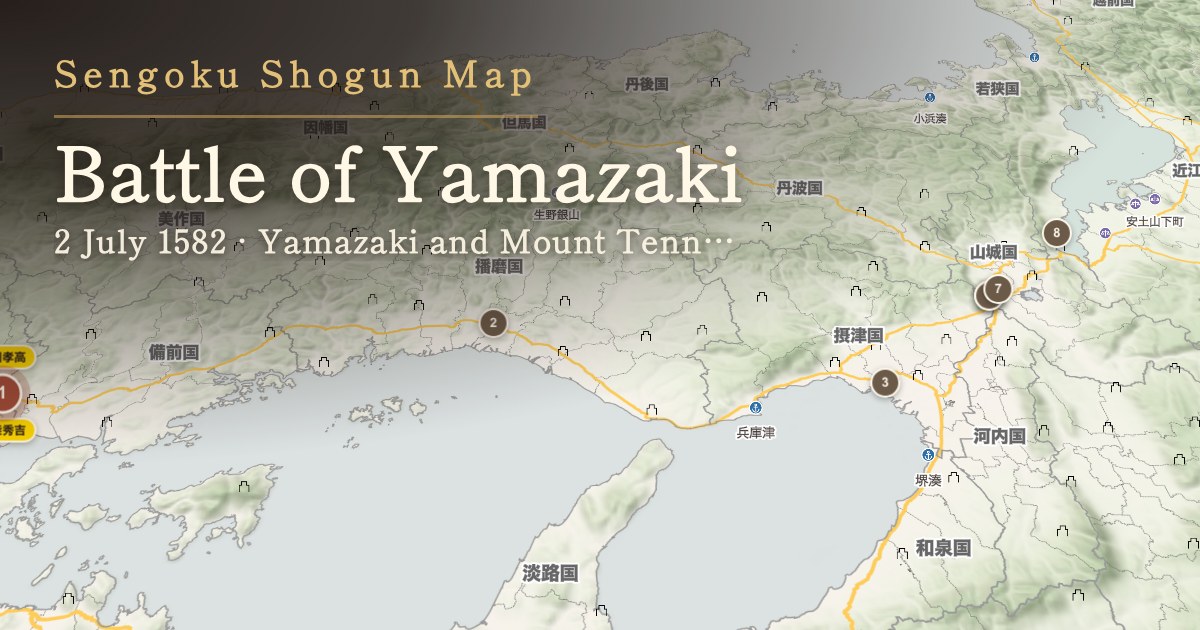
Course of the battle
1 June 23
Hideyoshi learns of Nobunaga's death; peace is made with the Mōri, and Shimizu Muneharu commits seppuku
While Hideyoshi's forces were conducting a water siege of Takamatsu Castle in Bitchū, word reached his camp that Nobunaga had died unexpectedly in Kyoto. Hideyoshi concealed Nobunaga's death and hastened to make peace with the Mōri. On June 4, the castle lord Shimizu Muneharu committed seppuku in exchange for the garrison's lives, and the castle surrendered.
Points of debate
Primary sources differ on the exact date Hideyoshi learned of Nobunaga's death, with some suggesting the 3rd day of the sixth month and others the 4th. Here, we center on June 4 (June 23 in the Gregorian calendar), when the peace was established and Muneharu committed seppuku, without confirming when Hideyoshi received the news itself.
Sources7810·Certainty: Disputed
2 June 26
Returns to Himeji Castle
Leaving Takamatsu, Hideyoshi advanced eastward along the Sanyōdō road and entered Himeji Castle on June 7. From here, he prepared to advance toward the Kinai region.
Points of debate
While Hideyoshi boasted in a dispatch to Nobutaka that he had ridden 27 ri in a single day and night, historical analysis of primary sources suggests that an advance party took three days from Takamatsu to Himeji, and Hideyoshi himself arrived after three days of travel.
Rushes back to Himeji on the great return from China
Sources10111213·Certainty: Medium
3 June 30
Arrives at Amagasaki
Advancing from Himeji via Akashi, Hideyoshi arrived at Amagasaki in Settsu on the 11th day of the sixth month, at the hour of the dragon (approximately 7–9 a.m.).
Points of debate
The meeting point with the Settsu forces may well have been at Tonda on the following day (the 12th), rather than at Amagasaki (see the next scene).
Sources10111214·Certainty: Medium
4 July 1
Rendezvous with Settsu forces, Nobutaka, and Nagahide at Tonda
On the 12th day of the sixth month, Hideyoshi reached Tonda in Settsu (modern Takatsuki, Ōsaka Prefecture). There he was joined by the Settsu forces under Ikeda Tsuneoki, Nakagawa Kiyohide, and Takayama Ukon, as well as the armies of Oda Nobutaka and Niwa Nagahide advancing from Izumi. The combined force now numbered over thirty thousand, more than double the Akechi forces.
Points of debate
The rendezvous at Tonda is supported by official documents from the town of Oyamazaki and academic journals, though official sources from Amagasaki and works on the "great return from China" such as Hattori's paper do not specify the meeting point.
Sources11015·Certainty: Medium
5 July 1
The two armies face off at Yamashiro
On the same 12th day, Akechi Mitsuhide deployed his direct forces of sixteen thousand in a fan-shaped formation east of Tennōzan. The narrows between Tennōzan and the Yodo River limited room for maneuver regardless of numerical advantage.
Points of debate
Regarding the site of Mitsuhide's main camp: official sources from Oyamazaki identify Saikano Mound No. 1 (in Oyamazaki) as a likely location (called "Gōbōzuka"), while official sources from Nagaoka City propose Esai Mound (in Nagaoka City) as a candidate. These sites are approximately 1.5 km apart, and no conclusive basis was found to confirm one or the other.
Faces Hideyoshi's forces at Yamashiro
Sources12310·Certainty: Disputed
6 July 2
Battle begins at the east foot of Tennōzan and along the Yodo River
On the 13th day of the sixth month, at the hour of the monkey (approximately 4:30 p.m.), the Toyotomi vanguard under Nakagawa Kiyohide, Takayama Ukon, and Toyotomi Hideaki advanced past the narrows and deployed east of Tennōzan. The Akechi forces under Saito Toshimitsu, Namikawa Kamon, and Matsuda Tarōzaemon attacked vigorously but could not break their lines. Meanwhile, Ikeda Tsuneoki, Katō Mitsuyasu, and Kimura Hayato, advancing along the Yodo River, landed east of the Enmeiji River and broke through the lightly held Akechi positions.
Points of debate
Official sources from Oyamazaki explicitly contradict the popular belief that the side controlling Tennōzan won the battle. They state: "The actual fighting took place in the wetlands east of Tennōzan, and the battle was decided by the combat along the Yodo River." Among the official sources from Oyamazaki and Nagaoka City that we consulted, none identify the struggle for Tennōzan's summit as the deciding factor in the battle.
Stands in the vanguard on the front lines
Stands in the vanguard on the front lines
Crosses the Enmeiji River and strikes the flank
Sources11016·Certainty: Disputed
7 July 2
The Akechi forces collapse; Mitsuhide retreats to Shōryūji Castle
After nightfall, the Akechi forces collapsed and Mitsuhide retreated to Shōryūji Castle to spend his final night. He is said to have escaped through the north gate during the night and made for Sakamoto in Ōmi.
Points of debate
Official sources from Nagaoka City also note the time and route of escape only cautiously, stating "during the night" and "is said." On his way back to Sakamoto, Mitsuhide is said to have been attacked and killed by loose samurai (Ōtsu official sources cite the Kenmei Kyōki as a reference). A stone marker in Kyoto identifies the location of the attack as Ogursu, but the details of his death remain qualified as "according to some accounts" or "is said to be."
Retreats to Shōryūji Castle; is said to have been killed while making for Sakamoto
Unable to support the Akechi forces, flees in defeat
Sources6101718·Certainty: Traditional account
8 July
Sakamoto Castle falls and the Akechi clan is destroyed
At Sakamoto Castle, surrounded by Hideyoshi's forces, Akechi Hidemitsu and others set fire to the keep and took their own lives. The castle fell with the Akechi clan. The date of the castle's fall is not specified beyond the month even in the chronology of official Ōtsu sources.
Points of debate
Many sources date the fall to "June 14," but Ōtsu official sources give only "June 1582" without specifying the day. The story that Hidemitsu killed Mitsuhide's wife and children does not appear in Ōtsu official sources and is not included here. As for the "Lake Crossing" (Kosui Watari), the tradition that Hidemitsu rode his horse across Lake Biwa to return to Sakamoto Castle, the Shiga Prefecture Cultural Properties Protection Association explicitly states: "Whether Hidemitsu actually rode across Lake Biwa on horseback cannot be confirmed in contemporary sources." Therefore, this cannot be accepted as historical fact.
Perishes at Sakamoto Castle with his clan
Sources61019·Certainty: Disputed
Historical significance
The battle marked the turning point when leadership over Nobunaga's succession passed to Hideyoshi. The traditional narrative that "the side controlling Tennōzan won" was formulated in later times. Official sources from Oyamazaki state that the actual fighting took place east of Tennōzan, and that the battle was decided by the combat along the Yodo River.
Advertisement
Key figures
羽柴氏
5

Commander-in-chief of the Hideyoshi side
Turned back from Bitchu and destroyed Mitsuhide in eleven days.
Sources123456789·Certainty: Medium
Commander on the Hideyoshi side
Took the Mount Tenno sector. Later known as Toyotomi Hidenaga.
Sources123456789·Certainty: Medium

Adviser to Hideyoshi
Said to have had a hand in the terms with the Mori and in arranging the forced march back.
Sources123456789·Certainty: Medium

Vanguard of the Hideyoshi side
Stood in the front line as one of the lords of Settsu.
Sources123456789·Certainty: Medium

Vanguard of the Hideyoshi side
Stood in the front line as one of the lords of Settsu.
Sources123456789·Certainty: Medium
池田氏
1

Commander on the Hideyoshi side
Said to have crossed the Enmyoji river and struck the Akechi flank.
Sources123456789·Certainty: Medium
丹羽氏
1

Commander on the Hideyoshi side
Joined with Oda Nobutaka and formed the core of Hideyoshi's force.
Sources123456789·Certainty: Medium
織田氏
1
Figurehead of the Oda house
Set up as nominal commander of the army as Nobunaga's son.
Sources123456789·Certainty: Medium
明智氏
3

Commander-in-chief of the Akechi
Beaten, he fell back to Shoryuji castle and is said to have died on the way to Sakamoto.
Sources123456789·Certainty: Medium
Senior retainer of the Akechi
Led the core of the Akechi army, was beaten, and was later captured.
Sources123456789·Certainty: Medium
Akechi commander
Held Sakamoto castle to the last and died there with the family.
Sources123456789·Certainty: Medium
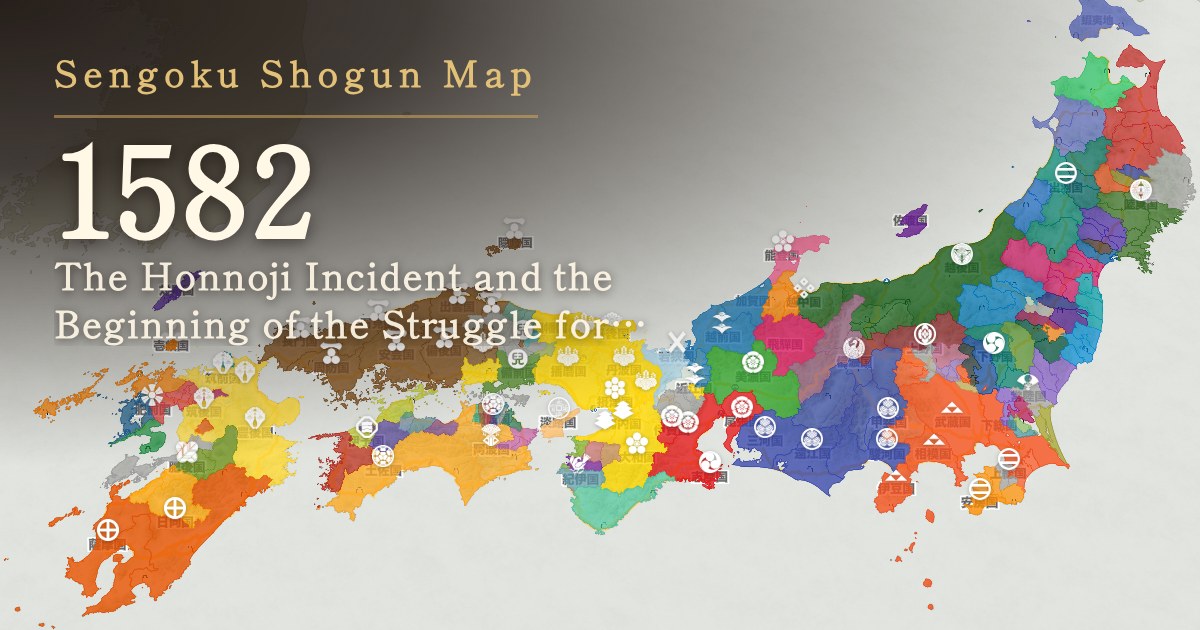
Other events of 1582
Notes on the data
Dates are given in the Gregorian calendar (Julian calendar). The July 2 date on this page corresponds to the 13th day of the sixth month of Tenshō 10 in the lunisolar calendar. Some sources use the lunisolar dates or the proleptic Gregorian conversion (giving the same day as July 12), which differs from this site's dating by ten days. The points on the map indicate archaeological sites and approximate positions for understanding the military movements. The location of Mitsuhide's main camp cannot be confirmed; sources differ, with some identifying it as Saikano Mound No. 1 and others as Esai Mound.
Sources consulted
- 大山崎町「秀吉の道 陶板絵図」
- 大山崎町「山崎合戦の地を歩くコース」
- 長岡京市「京都防衛の要 勝龍寺城」
- 長岡京市「勝竜寺城公園」
- 京都市「京都のいしぶみデータベース HU008 明智薮」
- 大津市「坂本城跡リーフレット」
- 岡山県「備中高松城跡」
- 岡山市「図書館所蔵資料で見る高松城水攻」
- 九州大学学術情報リポジトリ 服部英雄「ほらの達人 秀吉・『中国大返し』考」
- 城郭マスタ(shiro.geojson)
- 九州大学学術情報リポジトリ
- 服部英雄「ほらの達人 秀吉・『中国大返し』考」
- 兵庫県立歴史博物館「姫路城年表」
- 尼崎市「豊かな歴史をもつ尼崎」
- 甲子園短期大学紀要No.16 小林章「茨木の戦国大名 中川清秀(II)」
- 大山崎町「天下分け目の天王山」
- 長岡京市「勝竜寺城公園-明智光秀“最期の城”/細川ガラシャ“輿入れの城”」
- 京都市「京都のいしぶみデータベース」HU008 明智薮
- 公益財団法人滋賀県文化財保護協会「新近江名所圖会 第285回 明智左馬之助湖水渡り伝承の地・大津市打出浜」
The numbers in the text refer to the list above. Certainty indicates how far a statement is supported by the cited sources; it does not refer to the precision of the coordinates or the dating.
Advertisement